Creating an ad through Facebook’s Ads Manager is simple once you get the hang of it! If you’re just starting out with paid social advertising, this step-by-step guide to Facebook Ads will help you create an ad, target a specific audience, and be seen by potential customers and fans!
Create Your Campaign
The first thing you’ll do is select Create a Campaign.

You’ll be taken to a new page where you’ll need to decide the overall objective of your campaign, which is neatly broken down into three ad categories that follow the purchasing funnel. You can select an objective that will drive awareness, consideration, or conversions.
- Awareness: These ads are great for businesses trying to build brand awareness and a fan following.
- Consideration: These ads can drive users to click a link, like a post or your page, view a video, or even sign up for a mailing list. (Note: This is the best option for content promotion.)
- Conversion: These ads drive purchase-ready consumers to your website, an online catalog, or your physical store.
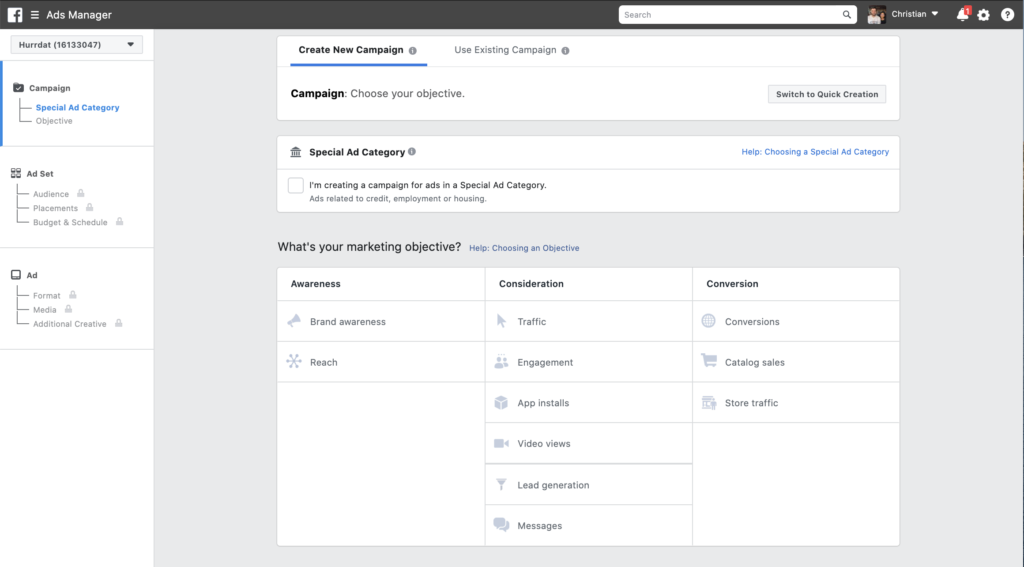
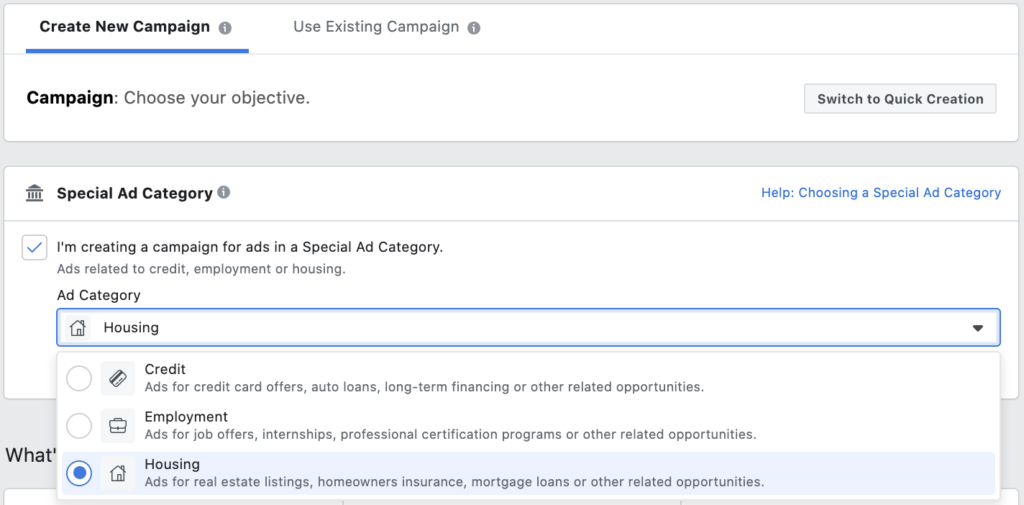
Recently, Facebook has added a Special Ad Category that allows for creating ads around Credit, Employment, and Housing, which are perfect for financial institutions, businesses, and real estate agents. If your business falls into these categories, be sure to take advantage of this feature!
Once you’ve chosen your objective or more niche category, you’ll need to name your campaign.
Why is naming your campaign important? As you build more, keeping everything organized will pay off. Naming a campaign something like “April Retargeting in Omaha” or “Wednesday Specials for July-August” rather than something nondescript like “Traffic” will make finding what you need much simpler.
On top of organizing your campaigns, be mindful that each campaign will contain ad sets and ads. What’s the difference?
- Ad Sets: Within each campaign, you create individual ad sets for every ad you want to run. Meaning, when you choose an objective, that’s the objective that every ad set you create within it will run. From there, you can change the audience you target, your budget, and your schedule. And just like with your campaigns, name your ad sets! This will help you quickly check specific campaigns.
- Ads: Ads are simply the post you select to share or have created specifically for your audience within an ad set. Ads are the final piece created within the full process of Facebook advertising.
Define Your Target Audience
When it comes to building your campaign’s target audience, be specific. Though targeting a broad audience might seem like a better idea because you can reach a larger population, this can work against you, especially if you’re a small business with a limited budget. Not only can targeting larger groups eat up your budget faster, but it can also mean you’re not reaching consumers who are interested in engaging or converting.
When defining your audience, you can narrow by location, age, gender, language, and detailed targeting.
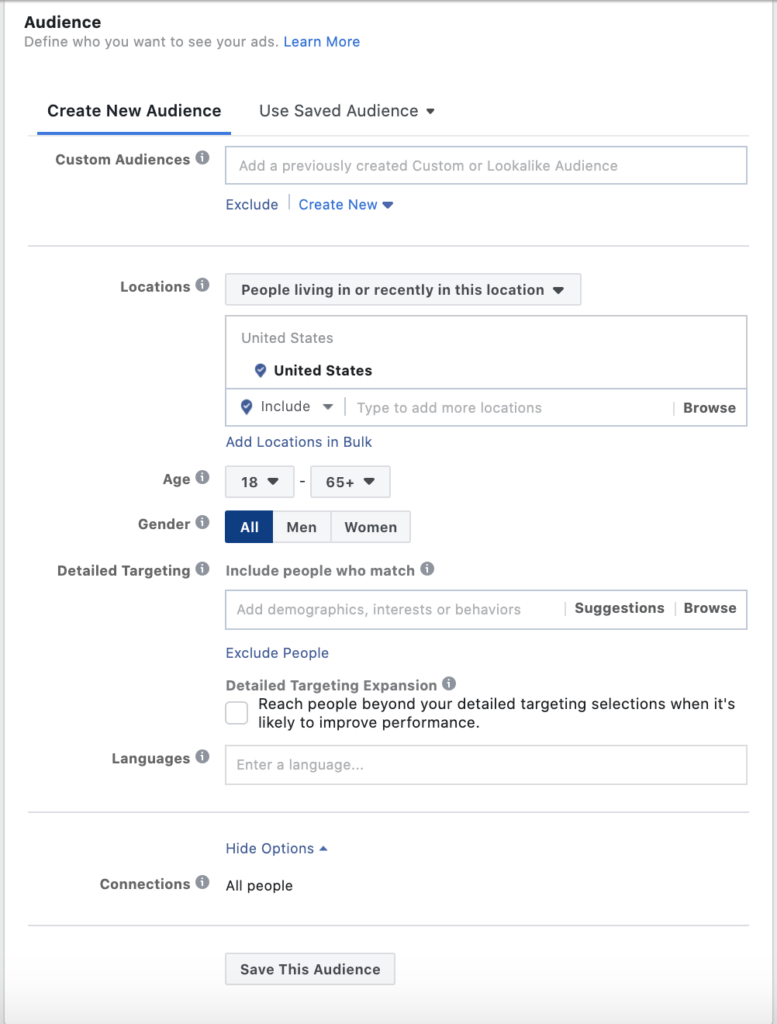
The most crucial of these will be location and detailed targeting.
When choosing a location, you can narrow your radius as small as 10 miles up to as wide as 50 miles from a city center. Again, be specific. If you’re a small business with only one location, you may be better off getting in front of consumers within 10 to 20 miles instead of 50.
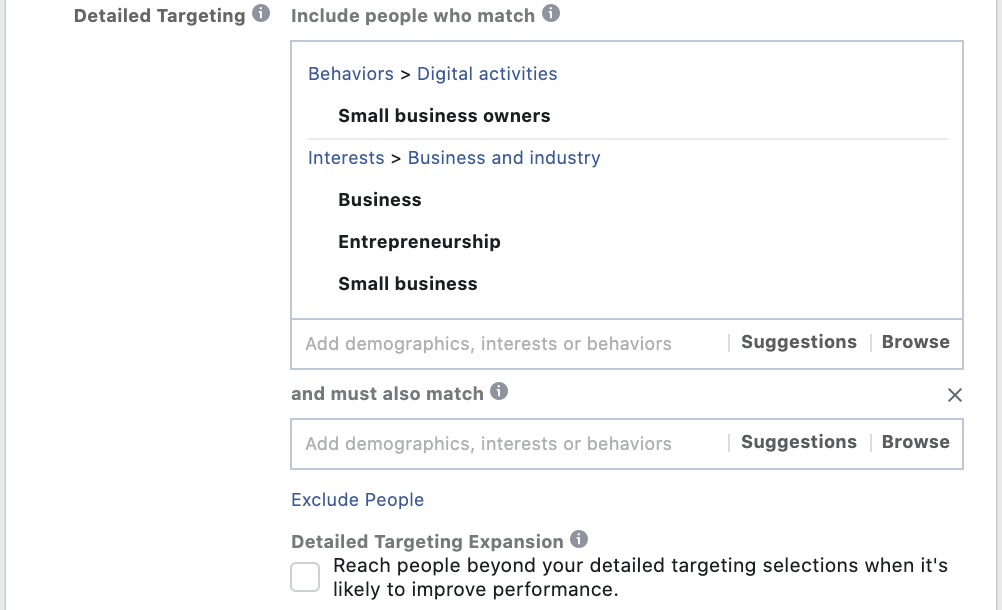
Detailed targeting helps you put ads in front of people who are more likely to be interested in what you have to offer based on other pages they’ve liked on Facebook. Think about the purchasing habits, socioeconomic statuses, and interests your customers have. Build a base with those demographics, interests, and behaviors, then use the Exclude People or Narrow Audience to get more specific (depending on what your objective is).
If you know you’re going to target this same audience for other ads, you can save the audience for future use.
Choose Where Your Ad Will Display
In general, Facebook allows ads to be shown in four places: Facebook, Instagram, Messenger, and within the Facebook Audience Network. Most advertisers on Facebook opt for the Automatic Placements option. If you don’t feel comfortable deciding where you want your ad to show, we recommend this option.
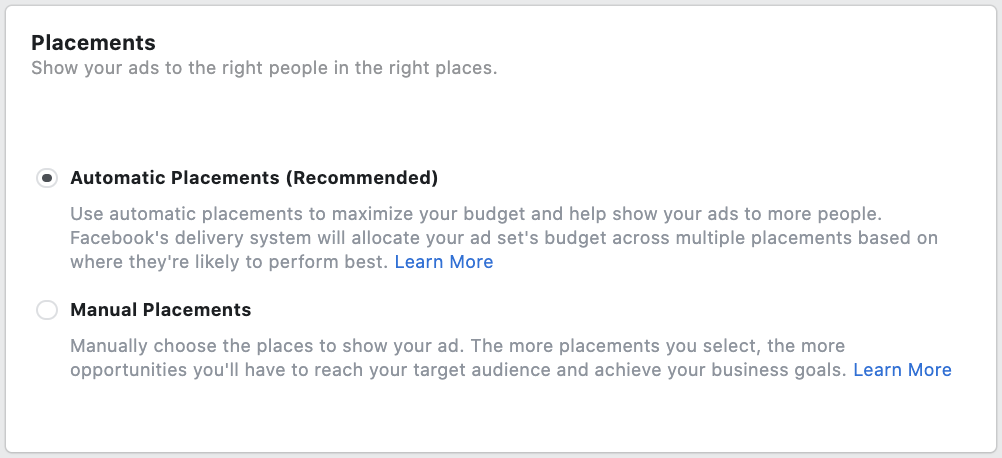
If, however, you prefer to manually determine where your ad will show, you’ll want to choose the Manual Placements option.
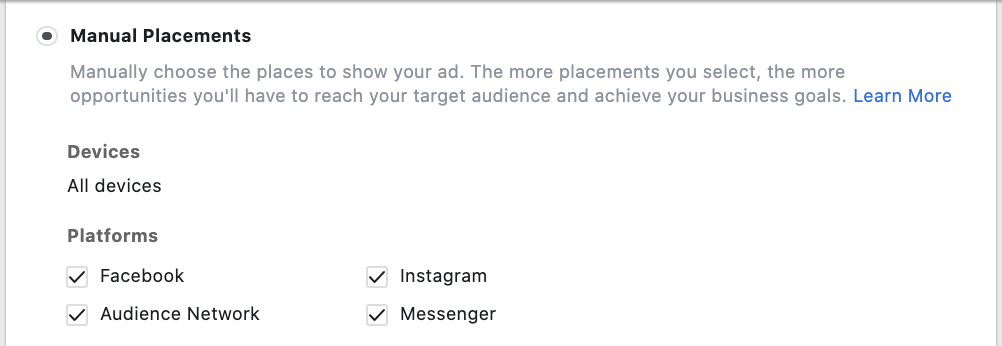
From there, you can choose where you’d like your ad to display on Facebook (the News Feed and Right Column are often the best options) or if you’d like to advertise on Instagram.
Facebook’s Audience Network won’t always be available, but if it is, you should consider it. This network has many similarities to Google’s Ad Roll program, which, when enrolled, your ads show up on affiliate websites, thus pushing your brand to more people in more places. Do take the time to consider putting an ad into the Audience Network, though, as this could quickly eat through your budget if you’re not careful.
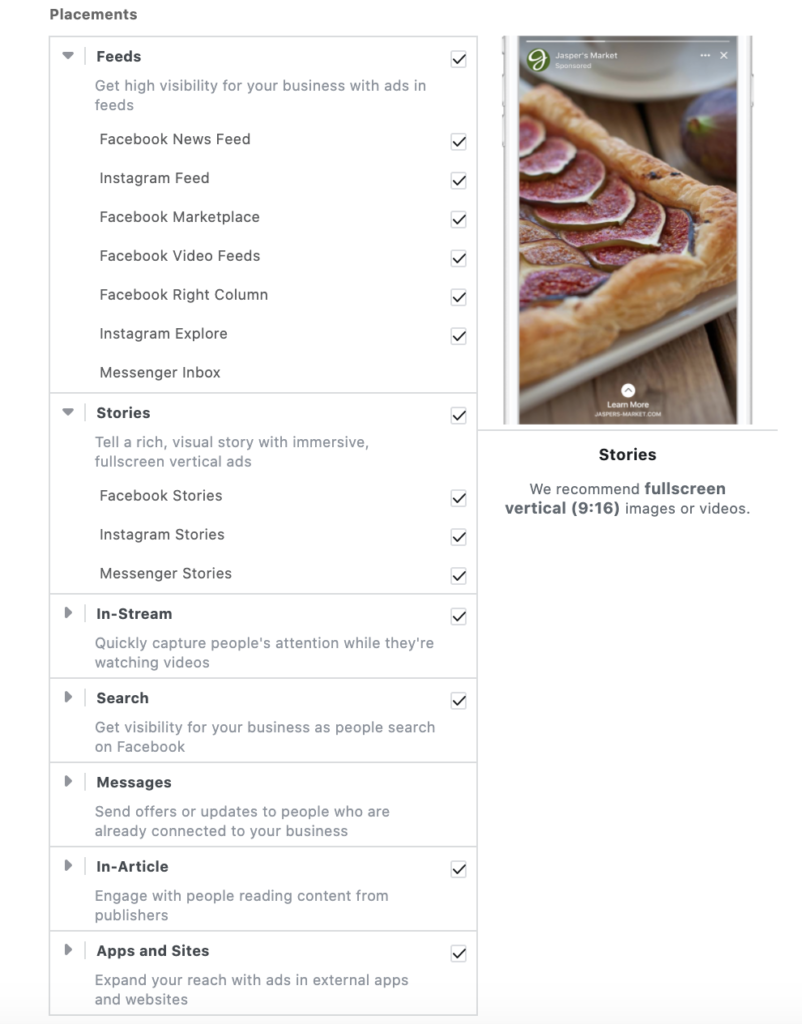
On top of that, Facebook also allows you to choose more granular placement options, as well. Instead of just posting your ad to “Facebook” or “Instagram”, which can mean almost anything now. You have the ability to select if it will show up in a users feed, stories, on the market place, in the right column, in search, and more. This gives brands more control over where they are trying to reach their customers, and takes out some of the guesswork when wondering, “where will my ad show up?”
Set Your Ad Budget & Schedule
After you’ve determined where your posts will be seen, it’s time to define your ad budget and schedule.
When it comes to your budget, you have two options: Daily Budget or Lifetime Budget. Daily Budget is how much you want to spend (at maximum) per day over a set time, whereas Lifetime Budget is the total amount you want to spend over a set time. If you plan to run an ad for a few days to a week, Daily Budget might be your best option. If you plan to run an ad for a few weeks or longer, Lifetime Budget might be better.
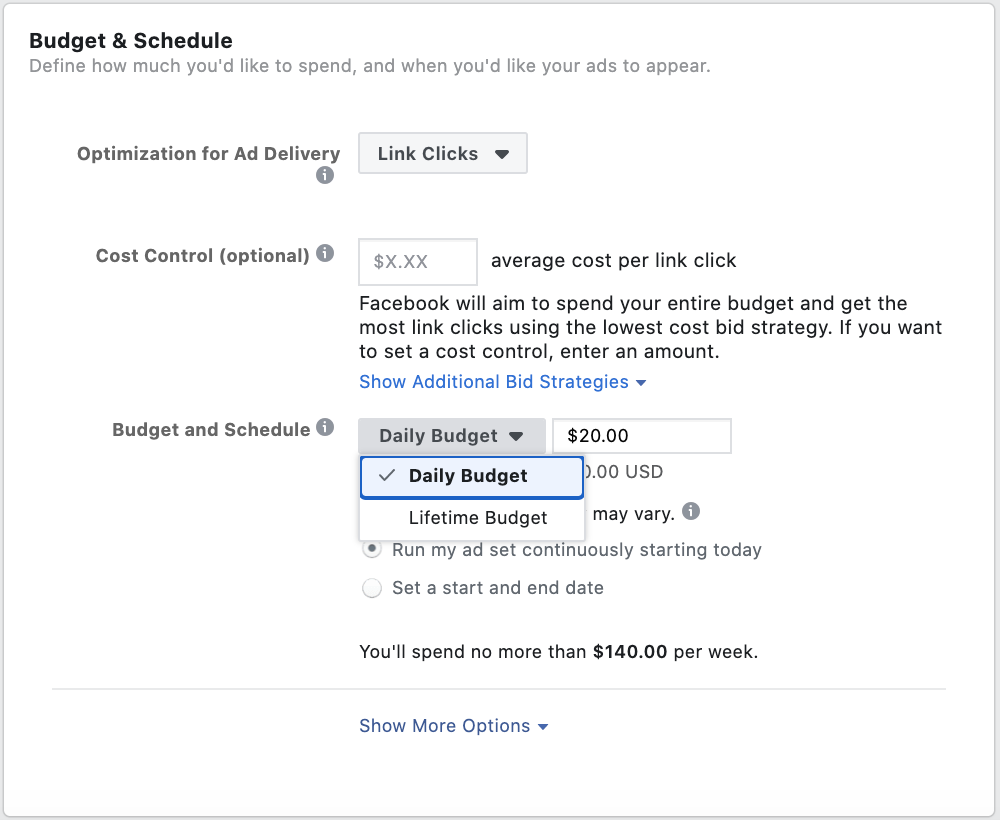
You’ll then need to set how long you’re going to run the ad, whether that’s continuously or on a scheduled start and end date. With a Daily Budget, you can use either choice, but with Lifetime Budget, you’re required to schedule the start and end of an ad.
Always check how much you’re spending and for how long before pushing your ad. This cannot be stressed enough. Facebook will change the spend amount if you switch between the Daily Budget and Lifetime Budget options, and the schedule for Lifetime Budget typically defaults to a month. Be sure to adjust these for your goals. Otherwise, you could spend much more (or less) than you’d like.
Optimize Your Ad Delivery
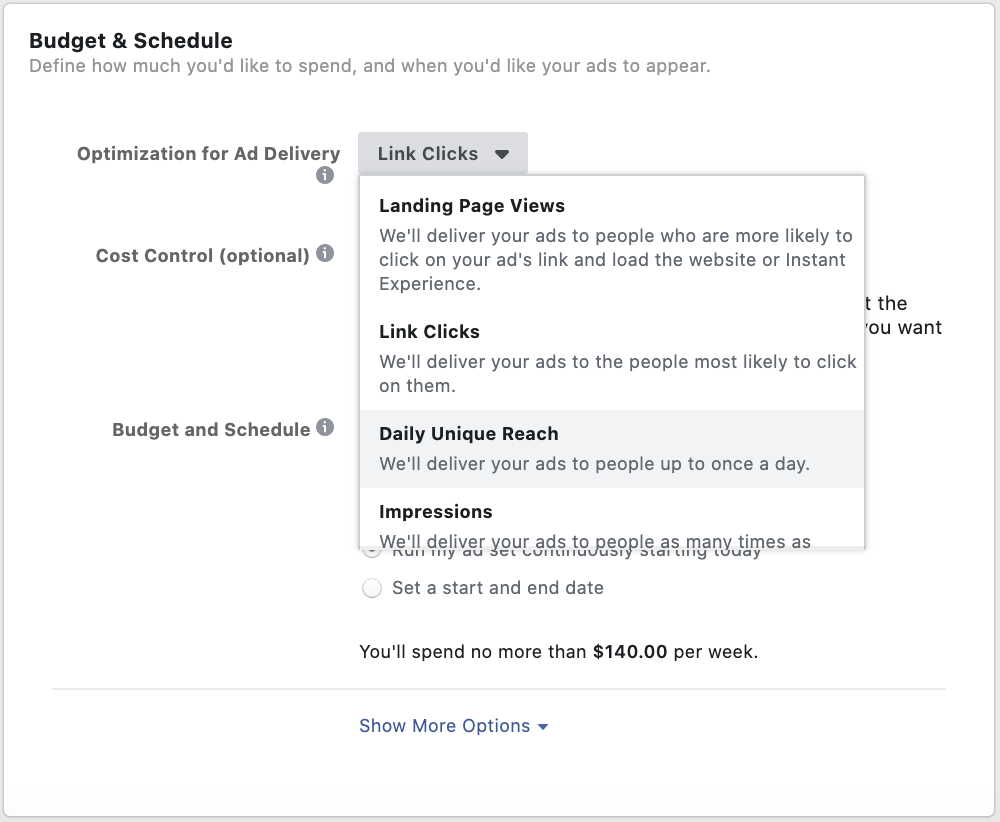
Once you’ve set your budget and ad schedule, you’ll then come across five options for deeper optimization for an individual ad set.
You’ll first choose your Optimization for Ad Delivery. Depending on the campaign you’ve chosen, you’ll see options like Landing Page Views, Impressions, Link Clicks, Daily Unique Reach, etc. In most cases, it’s best to stick with Facebook’s recommendation. But depending on your goals, switching to a choice that will get your ad in front of as many people as possible may be a better option.
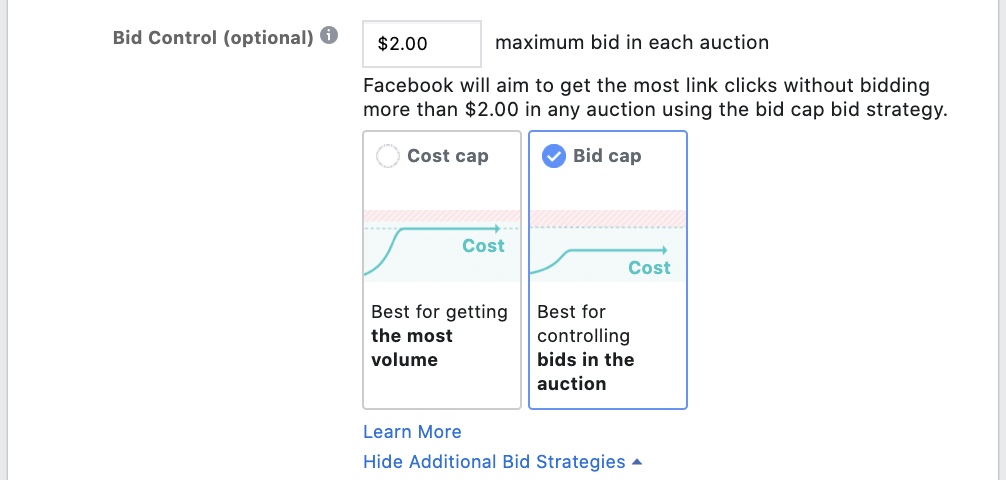
With Bid Control, you’re in charge of how much you’re willing to spend for each ad placement. Depending on the category you’ve placed your ad in, the cost per click can fluctuate throughout the lifetime of your ad. In an effort to extend the life of your ad, it’s smart to set a Bid Cap instead of a Cost Cap so that you don’t sprint through your entire budget in just a few days without reaching the people you were hoping to reach.
Depending on your audience, the When You Get Charged option can also play a major role in how much of your budget will be spent on a daily basis. With Impression, you’ll be charged every time a user sees the ad. With Link Click, you’ll be charged every time a user engages with the ad.
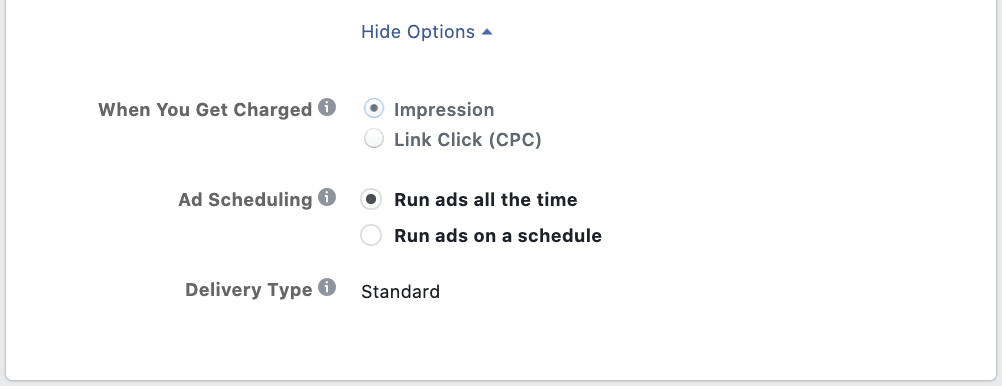
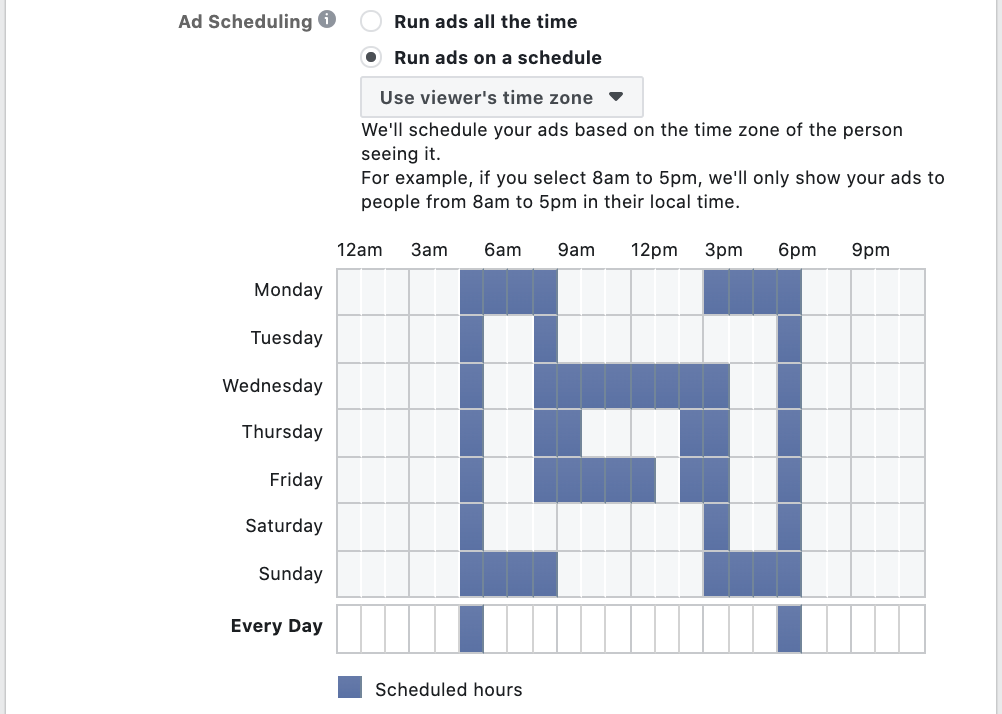
You also have the choice to optimize your ad delivery with Run Ads on a Schedule. This lets you set more specific guidelines for when an ad will be seen, such as specific days of the week or hourly increments.
Finally, you have a choice in how your ad will be delivered through Delivery Type. In most cases, you’ll use standard delivery, which pushes your ad to a selected audience within the schedule you’ve set. But if you’re running an ad last minute, accelerated delivery can push your ad to your audience as soon as possible. The only caveat to this is you need to place a manual bid to use this delivery.

Create Your Ad
The last step will be to set up the full ad. Depending on the ad campaign you’re running, what you see on this final page will be different, but the concepts of what you create are still applicable.
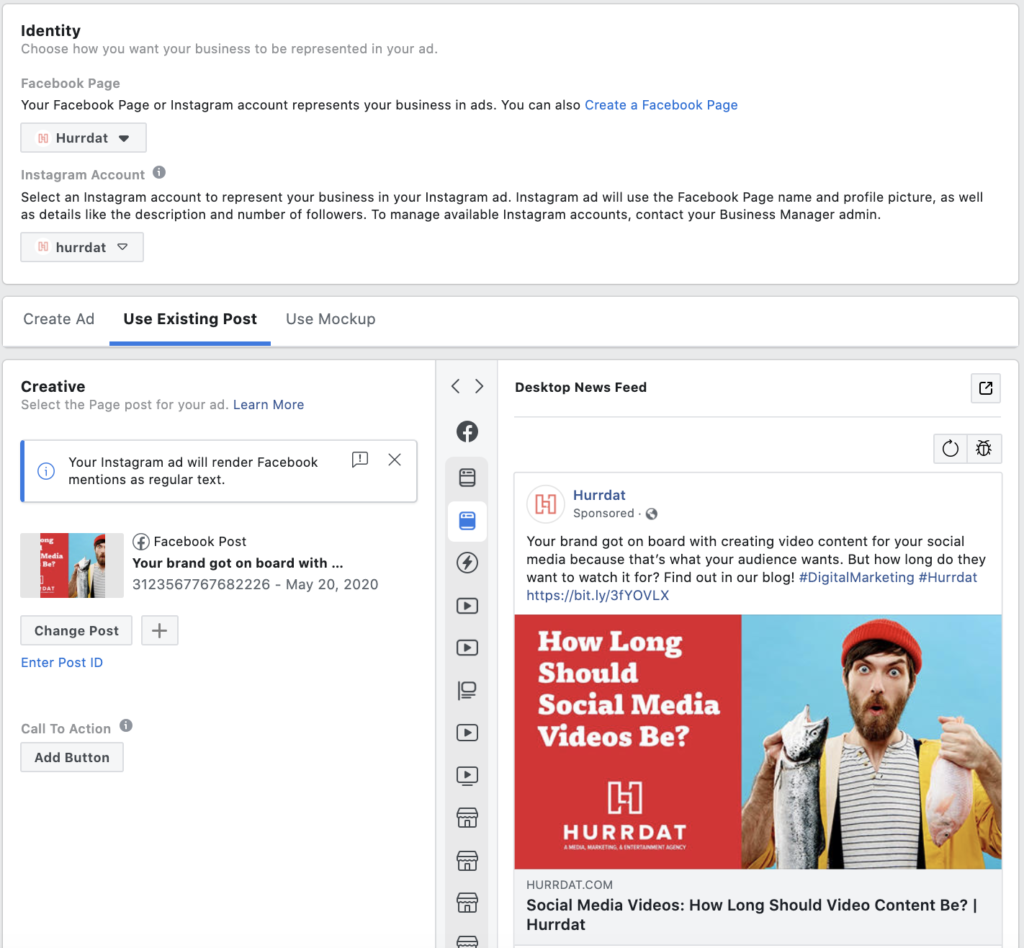
If you’re using an existing post, go to the Select a Page Post option and find the post you want to use.
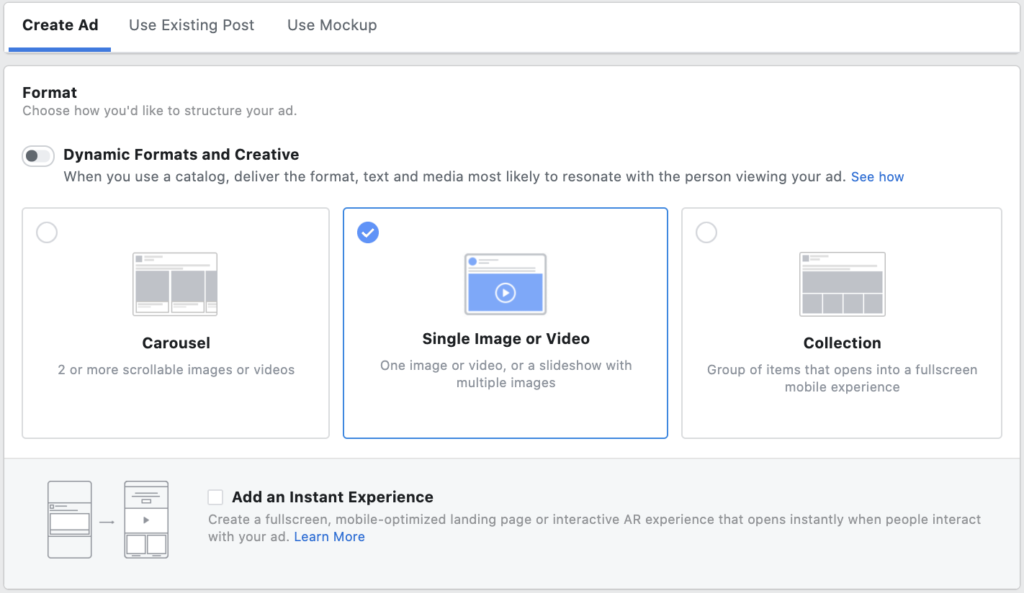
If you’re not using an existing post, select the Create New Ad option. From there, you have the ability to select a format with images (up to 6), a video, a slideshow, or a canvas ad (which combines both images and video). Then, you can upload or add from Facebook.
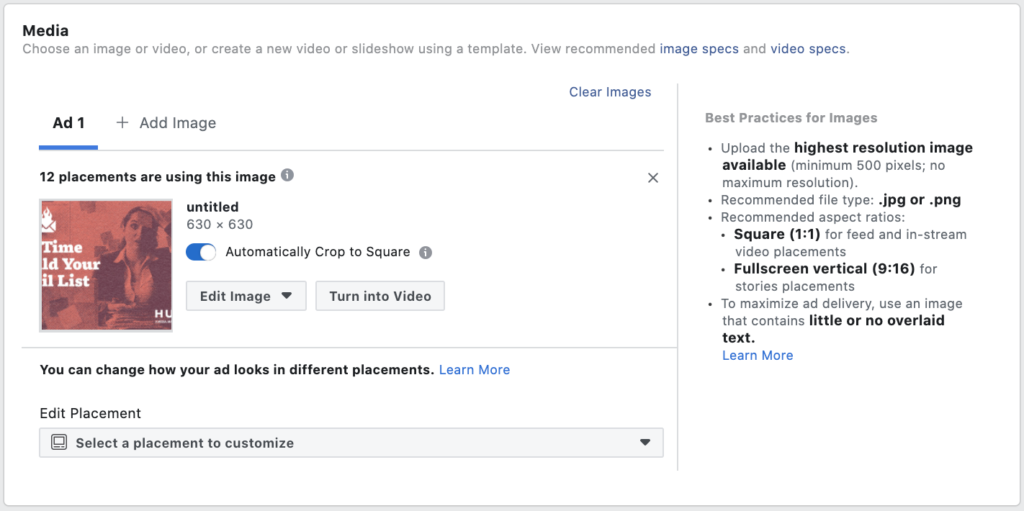
Start by adding media to your ad, whether it’s photo or a video.
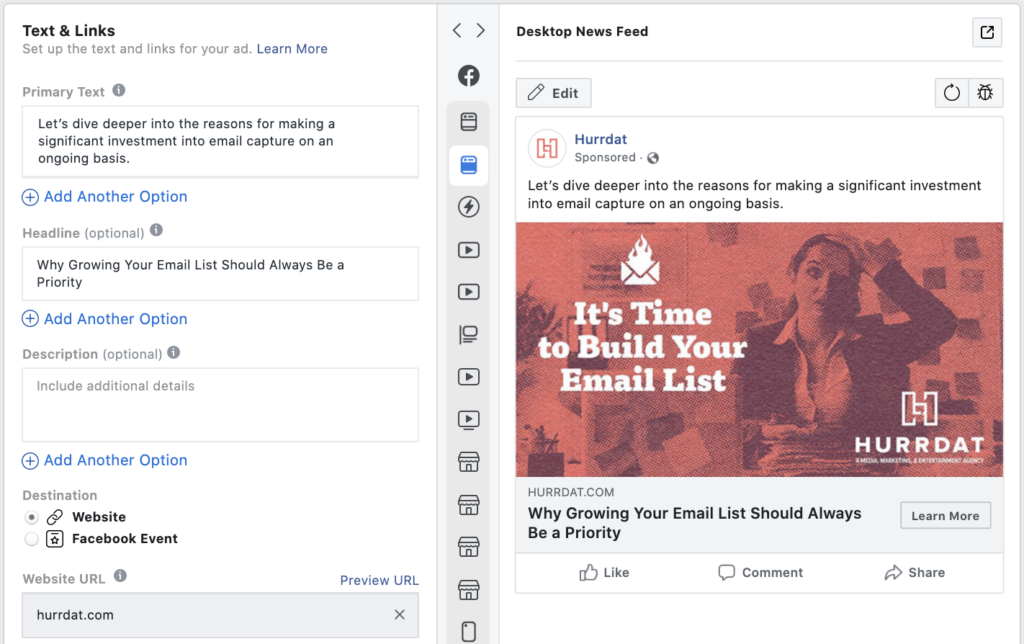
From there, you’ll move down the page to write your ad copy, enter the URL where you’re directing users (if necessary), and check your work with ad previews. These previews will show you how it will look on desktop, in the right column, on Instagram, and anywhere else you’ve selected for it to appear.
When everything looks right, it’s time to hit Place Order, and your ad will be set to go live.
Why Not Just Boost Existing Posts?
After all that, I bet you’re wondering, “Why would anyone choose to take more time to set up a Facebook ad instead of just boosting a post?” These are just Facebook ads, right?
Wrong. What makes boosting a post instead of creating a full ad (or multiple ad sets) so appealing is that it’s quick and simple. Boosting a post truthfully only requires a few clicks.
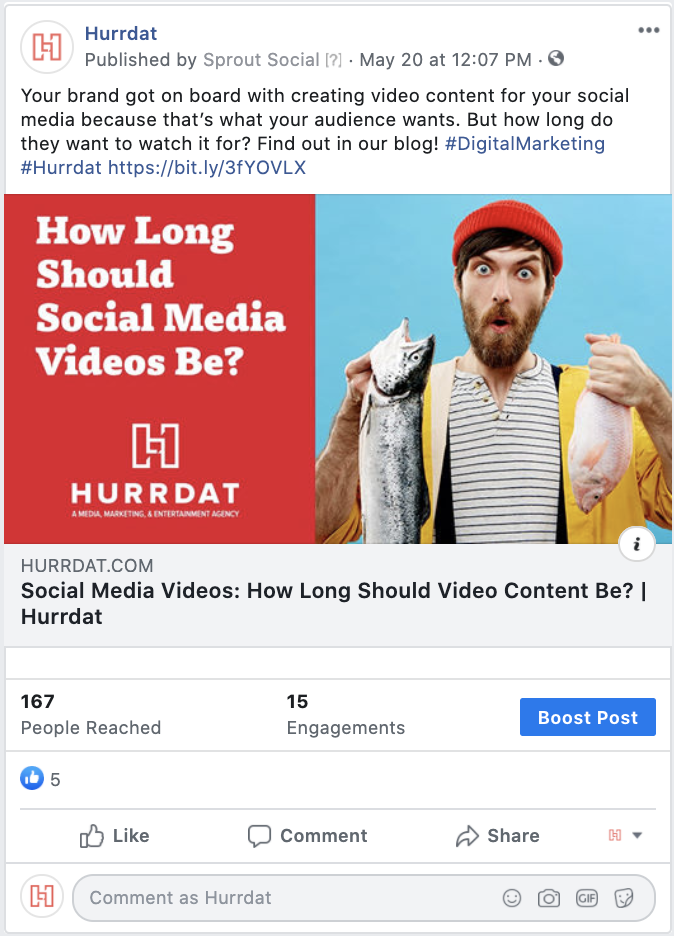
First, you click Boost Post on the bottom right corner of a Facebook post.
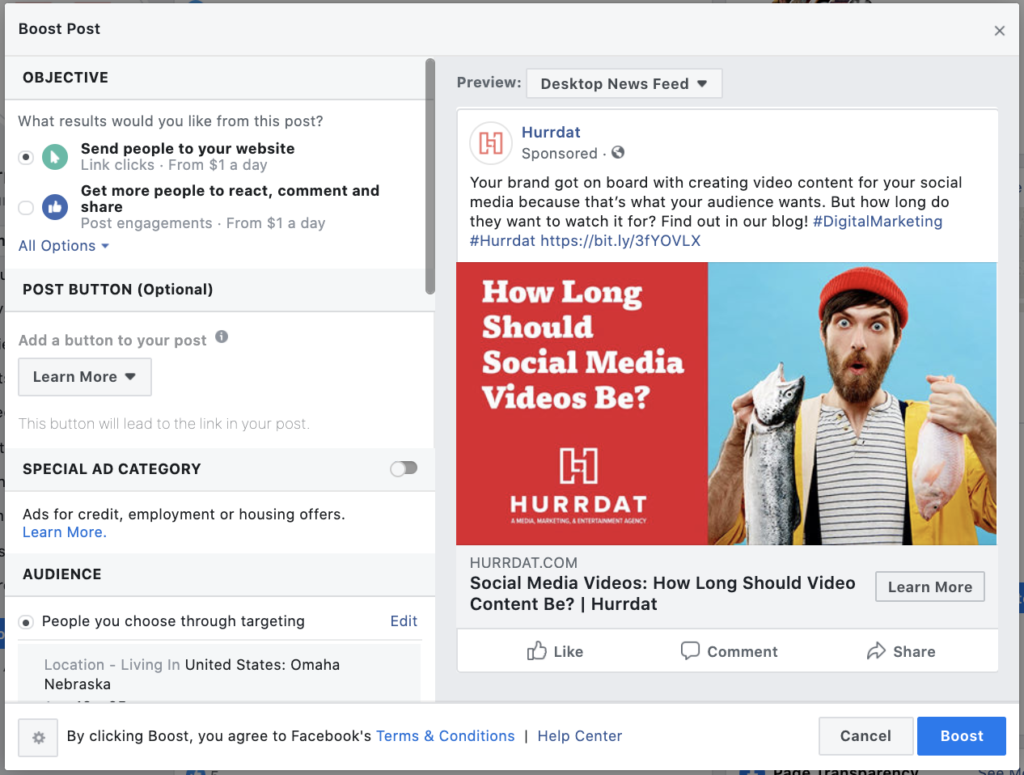
Next, you can choose an objective, you can choose if you want your image to have a CTA button attached to it, and which audience you’d like your chosen post to reach.
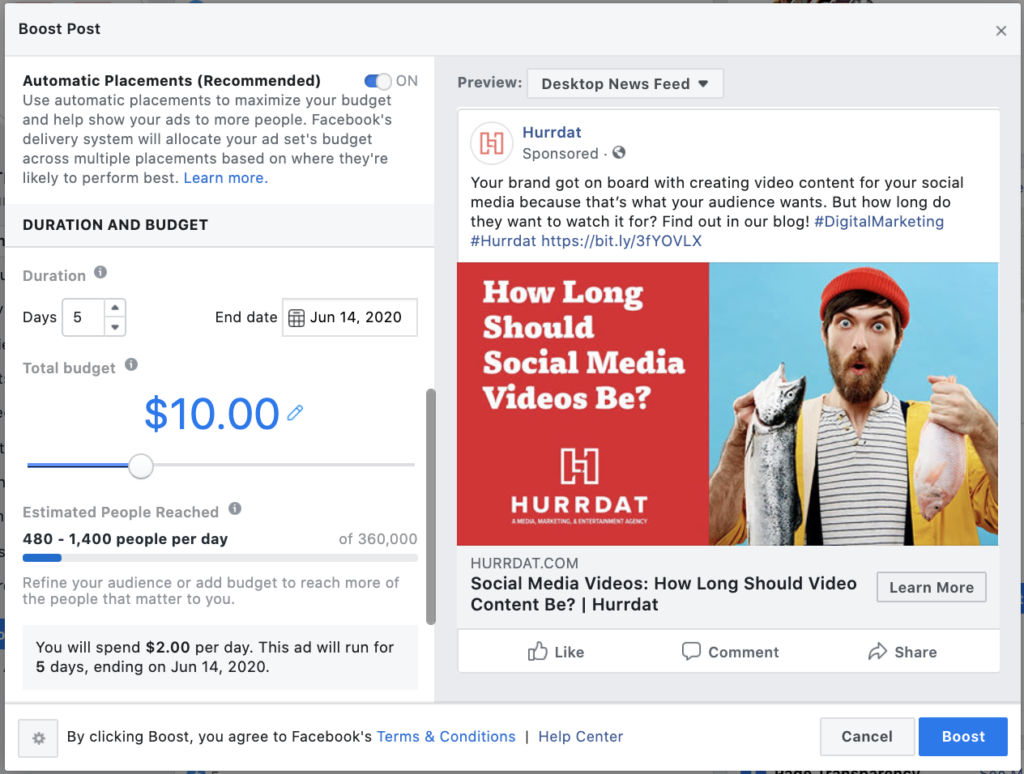
Then, you set your budget and schedule for how long you’d like your boosted post to run.
But herein lies the problem with a boosted post…when you choose to boost a post on your page, you’re only able to set up an ad with an objective to gain more engagement, and that’s for either your Facebook or sending people to your website. This will certainly put your brand in front of more people—if you’ve created an audience that targets people well—but it might not mean more money in your pocket from sales, especially if more conversions were your objective.
Boosting a post doesn’t do much more than provide a simplified way to get people to like your page or your posts. This option is great for individuals looking to promote a product or two or small businesses trying to share projects they’re working on. But using boosts as your Facebook advertising solution can burn a hole in your overall ad budget quickly if you’re not careful.
To give your business the best chance to succeed on Facebook, you should utilize the full suite of features that Facebook Ads Manager provides. With the ability to set up more campaigns with specific ad sets for individual ads, you have a better chance of reaching more people in more places and at the right time.